Eclipse JPA Editor tutorial
The JPA Diagram Editor is a graphical tool based on the Graphiti framework that enables the JPA developers to create, view, and edit their business data model as graphical diagram. In this article we will learn how to install it and use in your JPA projects.
JPA Diagrams at hand
JPA Diagram Editor is compatible with Indigo and later releases of the eclipse.
From the JPA specification point of view, JPA diagram editor offers full support for JPA 1.0. JPA 2.0 support development is in progress as well as support of additional JPA artifacts like embeddable classes and mapped superclasses.
The simplest way to use this plugin, is to enter Eclipse MarketPlace and look for it (Hint: use “jpa editor” in the Find box and choose to install the JPA Diagram Editor):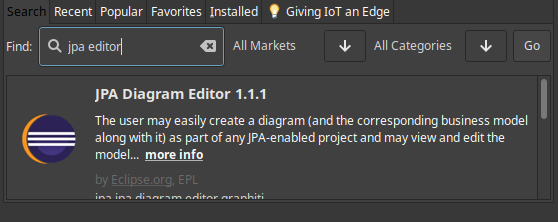
Features:
- The JPA diagram editor comprises the following general features:
- Ability to create entities and define relationships between them.
- Ability to import existing entities together with their relationships.
- Full synchronization with the underlying application code, that is, whenever you apply a change to any of the objects on the diagram, the corresponding application code updates automatically, and the opposite.
- Error and warning markers with informative quick info text. You can view details on the marked errors and warnings in the Problems view.
- Integration with the JPA Details view and the Miniature View.
Prerequisites:
You need to have:
- A JPA project to store your entities
- A Non-JPA project but with the Java Persistence facet enabled on that project
How to open the JPA Diagram:
The Open Diagram action is available on project level: Select the newly created JPA project and from its context menu select JPA Tools -> Open Diagram

Trick: You can open the JPA diagram also at JPA node level: Expand the JPA project and from the context menu of its JPA node, select Open Diagram.
How to create a new Entity using the JPA Palette:
From the right site of the editor, the so called Palette section, select Java Entity and drag&drop it to the diagram. A new entity class org.persistence.Entity1 with default primary key attribute should be created and shown in the diagram. By right-clicking on the icon, you can rename it and add attributes to your Entity.

You can change the default settings for your Entities by entering the Project Properties | JPA Section. There you can define the default package for your Entities, the Collection used by default for Relationship and lots of other settings.
How to see existing Entities in the diagram:
If you want to visualize existing Entities in the diagram, simply open the JPA Diagram and drag and drop the Entities from the project into the Diagram.

Hot Trick: How to show all the existing Entities you have in one shot ? simply right click on your JPA Diagram and select “Show all Entities“
Recommended Articles
Enhance Your Web Development with Eclipse and JSF Support - A Comprehensive Guide
Learn how to enable JSF support in Eclipse using the latest Enterprise Java Developer Tools. #Eclipse #JSF #JavaDev #WebDevelopment #CloudNative
Configure NetBeans IDE with WildFly Application Server for Seamless Java Development
Learn how to set up NetBeans IDE with WildFly application server for efficient Java development. #NetBeansIDE #WildFly #JavaDevelopment
Mastering Eclipse with M2Eclipse: A Comprehensive Guide to Java Development
Enhance your Java development workflow with Eclipse and M2Eclipse, a powerful plugin that integrates Maven seamlessly. Learn how to create a Maven project in Eclipse for efficient dependency management and build automation.
Introduction to MicroProfile GraphQL: A Comprehensive Guide
Learn about MicroProfile GraphQL basics and a full example application on WildFly server. #MicroProfile #GraphQL #Java #CloudNative #WildFly31