A Maven starter for Jakarta EE projects
This short article will teach you how to kickstart a simple Jakarta EE project using a Maven archetype that includes the basic building blocks for developing an application.
The Jakarta Eclipse starter
The Jakarta EE starter is available in two flavours:
- You can run it online and download the sample Maven project from https://start.jakarta.ee/
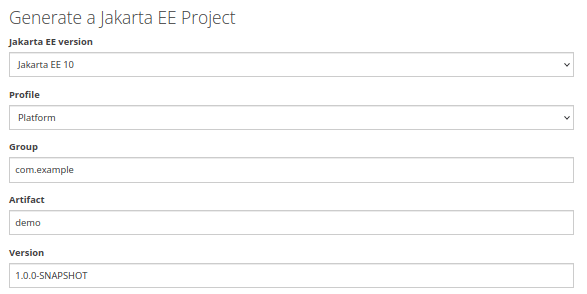
- Also, can generate a Maven project using the org.eclipse.starter:jakartaee10-minimal archetype. To do that, from the execute the following command:
mvn archetype:generate -DarchetypeGroupId=org.eclipse.starter -DarchetypeArtifactId=jakartaee10-minimal -DarchetypeVersion=1.1.0 -DgroupId=com.example -DartifactId=demo -Dprofile=api -Dversion=1.0.0-SNAPSHOT -DinteractiveMode=falseNext, let’s run the above command and check the outcome:
├── pom.xml
└── src
    └── main
        ├── java
        │   └── com
        │       └── example
        │           └── demo
        │               ├── ApplicationConfig.java
        │               └── resources
        │                   ├── HelloRecord.java
        │                   └── RestResource.java
        ├── resources
        │   └── META-INF
        │       └── beans.xml
        └── webapp
            └── web.xml
The built-in application includes a REST Service example:
package com.example.demo.resources;

import jakarta.ws.rs.GET;
import jakarta.ws.rs.core.MediaType;
import jakarta.ws.rs.Path;
import jakarta.ws.rs.Produces;

@Path("hello")
public class RestResource {

    @GET
    @Produces(MediaType.APPLICATION_JSON)
    public HelloRecord hello(){
        return new HelloRecord("Hello from Jakarta EE");
    }
}
On the configuration side, the pom.xml has the Jakarta EE API dependency already set in pom.xml. Therefore, you will be able to use the Jakarta EE Full profile in your project and Java 17:
<properties>
        <maven.compiler.release>17</maven.compiler.release>
        <project.build.sourceEncoding>UTF-8</project.build.sourceEncoding>
    </properties>
    . . . . .
    <dependencies>
        <dependency>
            <groupId>jakarta.platform</groupId>
            <artifactId>jakarta.jakartaee-api</artifactId>
            <version>10.0.0</version>
            <scope>provided</scope>
        </dependency>
    </dependencies>
Making the project WildFly-friendly
Firstly, to simplify the deployment and management of the application on WildFly, you can add the wildfly-maven-plugin in your pom.xml:
<plugin>
	<dependency>
	   <groupId>org.wildfly.plugins</groupId>
	   <artifactId>wildfly-maven-plugin</artifactId>
	   <version>4.0.0.Final</version>
	</dependency>
</plugin>
By adding the wildfly-maven-plugin you can deploy the Jakarta EE starter with:
mvn install wildfly:deployMore about Maven WildFly plugin in this article: How to configure and run Maven WildFly plugin
Then, if you want your Jakarta EE starter to be a Bootable JAR application, you can add the wildfly-jar-maven-plugin in your pom.xml:
<plugin>
	<groupId>org.wildfly.plugins</groupId>
	<artifactId>wildfly-jar-maven-plugin</artifactId>
	<version>8.0.1.Final</version>
	<configuration>
		<feature-pack-location>wildfly@maven(org.jboss.universe:community-universe)#${version.server.bom}</feature-pack-location>
		<layers>
			<layer>jaxrs</layer>
		</layers>
		<excluded-layers>
			<layer>deployment-scanner</layer>
		</excluded-layers>
	</configuration>
	<executions>
		<execution>
			<goals>
				<goal>package</goal>
			</goals>
		</execution>
	</executions>
</plugin>
Then, you can build and start the example application with:
mvn wildfly-jar:runFinally, you should see the application up and running in seconds:
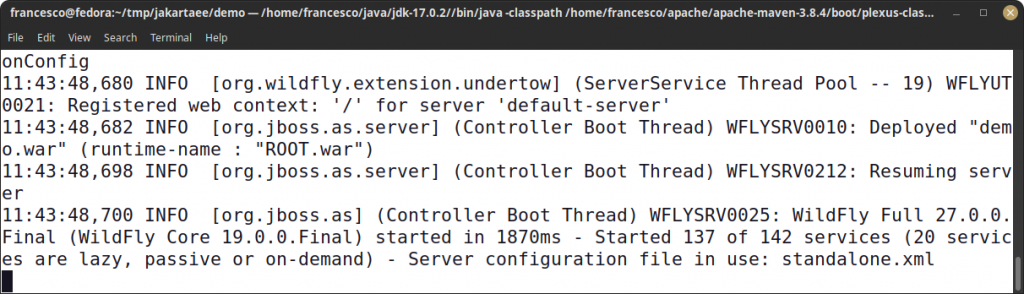
Then, test the application as follows:
curl http://localhost:8080/hello
{"text":"Hello from Jakarta EE"}
Learn more about WildFly Bootable Jar in this article: Turn your WildFly applications in bootable JARs
Simplifying the JAX-RS example
The built-in starter uses an ApplicationConfig Class to activate JAX-RS and provide a path for your REST requests:
@ApplicationPath("")
public class ApplicationConfig extends Application {

}
As a matter of fact, you can remove the above Class from the project and include the REST Mapping through the following addition in the web.xml file. For example:
<servlet-mapping>
        <servlet-name>jakarta.ws.rs.core.Application</servlet-name>
        <url-pattern>/*</url-pattern>
</servlet-mapping>
The above entries, maps the jakarta.ws.rs.core.Application Servlet with the URL pattern for your REST Requests.
Conclusion
This article was a quick ride through the Eclipse Jakarta EE Maven archetype that provides the backbone of a sample Jakarta EE 10 application.
Source code for this article: https://github.com/fmarchioni/mastertheboss/tree/master/jakartaee/eclipse-starter
Recommended Articles
Create a Powerful Jakarta EE Maven Archetype for Enterprise Applications - Step-by-Step Guide
Master the process of creating a customizable Jakarta EE Maven Archetype to accelerate your development workflow. Learn from our expert guide today!
Create a Java Web Application with Maven from the Command Line
Learn how to create a simple Java web application using Maven's archetype-webapp and deploy it directly from the command line.
Speed Up Your Enterprise Java Project Creation with WildFly Maven Archetypes
Learn how to use WildFly Maven archetypes for quick project setup in this tutorial. #WildFly #JavaArchetypes #EnterpriseJava
Create and Use a Maven Multi-Module Project with EJB Application Example
Learn how to create an EJB application using Maven multi-module projects, including client and server modules. #Maven #JavaEE #WildFly31