Securing Netty applications with Elytron
This article introduces you to securing Netty applications using Elytron security framework, which is a core component of WildFly application server.
Pre-requisites:
- Firstly, you should already know the basics of Netty client-server framework. If you are new to it, check the following article to learn more: Getting started with Netty
- Then, you should be familiar with Elytron security framework. Check this article for a quick introduction to it: Creating an Elytron Security Realm for WildFly
Setting up the Netty Project
The example project we will discuss here is available in the elytron examples repository. To set up a secured Netty server we will add the following components:
- An InboundHandler which allows to handle a specific type of messages. In this example, we will be handling incoming HttpObject.
- A Channel Initializer: This is a special handler whose purpose is to initialize the connection applying the Security layer in the Channel pipeline.
- A Main class which bootstraps the Netty Server, adding as Child Handler the Channel Initializer, which in turns contains a reference to Elytron Security domain
Let’s start checking each single component, starting from the Main class.
Coding the BootStrap Class
To bootstrap a Netty server, you need to use a ServerBootstrap Class. The difference from a plain text Netty server is that, in this example, we are adding a Security Handler as Child Handler.
To create the Security Handler we use the ElytronHandlers which is backed by a SimpleMapBackedSecurityRealm:
public class HelloWorld {

    private static final WildFlyElytronProvider elytronProvider = new WildFlyElytronProvider();

    private static final int PORT = 7776;

    /**
     * @param args
     */
    public static void main(String[] args) throws Exception {
        System.out.println("Here we go");

        SecurityDomain securityDomain = createSecurityDomain();
        securityDomain.registerWithClassLoader(HelloWorld.class.getClassLoader());

        EventLoopGroup parentGroup = new NioEventLoopGroup(1);
        EventLoopGroup childGroup = new NioEventLoopGroup(1);

        ElytronHandlers securityHandlers = ElytronHandlers.newInstance()
                .setSecurityDomain(securityDomain)
                .setFactory(createHttpAuthenticationFactory())
                .setMechanismConfigurationSelector(MechanismConfigurationSelector.constantSelector(
                        MechanismConfiguration.builder()
                                .addMechanismRealm(MechanismRealmConfiguration.builder().setRealmName("Elytron Realm").build())
                                .build()));

        ServerBootstrap bootstrap = new ServerBootstrap();
        bootstrap.option(ChannelOption.SO_BACKLOG, 1024);
        bootstrap.group(parentGroup, childGroup)
            .channel(NioServerSocketChannel.class)
            .handler(new LoggingHandler(LogLevel.INFO))
            .childHandler(new TestInitialiser(securityHandlers));

        bootstrap.bind(PORT).sync();
    }

    private static HttpServerAuthenticationMechanismFactory createHttpAuthenticationFactory() {
        HttpServerAuthenticationMechanismFactory factory = new SecurityProviderServerMechanismFactory(() -> new Provider[] {elytronProvider});

        return  new FilterServerMechanismFactory(factory, true, "BASIC");
    }

    private static SecurityDomain createSecurityDomain() throws Exception {
        // Create an Elytron map-backed security realm
        SimpleMapBackedSecurityRealm simpleRealm = new SimpleMapBackedSecurityRealm(() -> new Provider[] { elytronProvider });
        Map<String, SimpleRealmEntry> identityMap = new HashMap<>();

        // Add user alice
        identityMap.put("alice", new SimpleRealmEntry(getCredentialsForClearPassword("alice123+"), getAttributesForRoles("employee", "admin")));

        // Add user bob
        identityMap.put("bob", new SimpleRealmEntry(getCredentialsForClearPassword("bob123+"), getAttributesForRoles("employee")));

        simpleRealm.setIdentityMap(identityMap);

        // Add the map-backed security realm to a new security domain's list of realms
        SecurityDomain.Builder builder = SecurityDomain.builder()
                .addRealm("ExampleRealm", simpleRealm).build()
                .setPermissionMapper((principal, roles) -> PermissionVerifier.from(new LoginPermission()))
                .setDefaultRealmName("ExampleRealm");

        return builder.build();
    }

    private static List<Credential> getCredentialsForClearPassword(String clearPassword) throws Exception {
        PasswordFactory passwordFactory = PasswordFactory.getInstance(ALGORITHM_CLEAR, elytronProvider);
        return Collections.singletonList(new PasswordCredential(passwordFactory.generatePassword(new ClearPasswordSpec(clearPassword.toCharArray()))));
    }

    private static MapAttributes getAttributesForRoles(String... roles) {
        MapAttributes attributes = new MapAttributes();
        HashSet<String> rolesSet = new HashSet<>();
        if (roles != null) {
            for (String role : roles) {
                rolesSet.add(role);
            }
        }
        attributes.addAll(RoleDecoder.KEY_ROLES, rolesSet);
        return attributes;
    }

}
If you want to switch to another kind of Realm, update the method createSecurityDomain accordingly. For example, here is how to create a FileSystemSecurityRealm:
FileSystemSecurityRealm fsRealm = new FileSystemSecurityRealm(fsRealmPath, NameRewriter.IDENTITY_REWRITER, 2, true);Coding the Content Handler
Next, we will be adding the InBoundHandler which reads the incoming HTTP Connections and produces a Response. The response is an FullHttpResponse which also includes the Security’s Principal Name:
class TestContentHandler extends SimpleChannelInboundHandler<HttpObject> {

    private static final AsciiString CONTENT_TYPE = AsciiString.cached("Content-Type");
    private static final AsciiString CONTENT_LENGTH = AsciiString.cached("Content-Length");
    private static final AsciiString CONNECTION = AsciiString.cached("Connection");
    private static final AsciiString KEEP_ALIVE = AsciiString.cached("keep-alive");

    TestContentHandler() {
        System.out.println("TestContentHandler:new");
    }

    @Override
    public void channelReadComplete(ChannelHandlerContext ctx) {
        System.out.println("TestContentHandler:channelReadComplete");

        ctx.flush();
    }

    @Override
    protected void channelRead0(ChannelHandlerContext ctx, HttpObject msg) throws Exception {
        System.out.println("TestContentHandler:read0");

        if (msg instanceof HttpRequest) {
            HttpRequest req = (HttpRequest) msg;

            boolean keepAlive = HttpUtil.isKeepAlive(req);
            final String identity = getElytronIdentity();
            FullHttpResponse response = new DefaultFullHttpResponse(HTTP_1_1, OK, Unpooled.wrappedBuffer(getContent(identity)));
            response.headers().set(CONTENT_TYPE, "text/plain");
            response.headers().setInt(CONTENT_LENGTH, response.content().readableBytes());

            if (!keepAlive) {
                ctx.write(response).addListener(ChannelFutureListener.CLOSE);
            } else {
                response.headers().set(CONNECTION, KEEP_ALIVE);
                ctx.write(response);
            }
        } else {
            System.out.println("TestContentHandler - Not a HttpRequest");
        }

    }

    @Override
    public void exceptionCaught(ChannelHandlerContext ctx, Throwable cause) {
        cause.printStackTrace();
        ctx.close();
    }

    private byte[] getContent(final String identity) {
        return String.format("Current identity '%s'", identity).getBytes(StandardCharsets.UTF_8);
    }

    private String getElytronIdentity() {
        SecurityDomain securityDomain = SecurityDomain.getCurrent();
        if (securityDomain != null) {
            SecurityIdentity securityIdentity = securityDomain.getCurrentSecurityIdentity();
            if (securityIdentity != null) {
                return securityIdentity.getPrincipal().getName();
            }
        }

        return null;
    }


}
Coding the ChannelInitializer
Finally, to bootstrap our Netty Server we need a ChannelInitializer. The ChannelInitializer contains a Pipeline of Handlers. In this example, we are adding at the end of the Pipeline the Handler from our previous section:
class TestInitialiser extends ChannelInitializer<SocketChannel> {

    private final Function<ChannelPipeline, ChannelPipeline> securityHandler;

    TestInitialiser(final Function<ChannelPipeline, ChannelPipeline> securityHandler) {
        this.securityHandler = securityHandler;
    }

    @Override
    protected void initChannel(SocketChannel ch) throws Exception {
        ChannelPipeline pipeline = ch.pipeline();
        pipeline.addLast(new HttpServerCodec());
        pipeline.addLast(new HttpServerExpectContinueHandler());
        securityHandler.apply(pipeline);
        pipeline.addLast(new TestContentHandler());
    }

}
Testing the example
The example project includes a Maven Java exec plugin, therefore you can build and run it as follows:
mvn clean install exec:execAs you can see from the following snapshot, the servers starts and binds Netty to all available network addresses on port 7776:
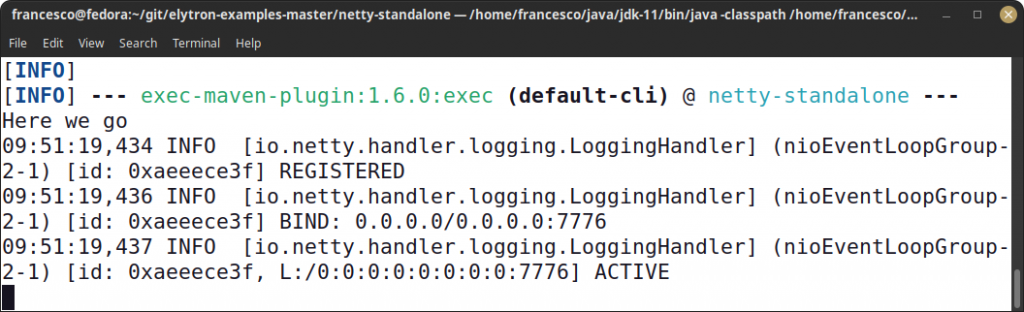
Then, from the browser or the command line, use one of the available identities to reach the Netty Server. For example:
$ curl -u alice:alice123+ http://localhost:7776
Current identity 'alice'
Conclusion
That’s all. This article was a quick walk through an example of a Netty Server which uses an Elytron Security Domain in the Pipiline of its Socket Handlers
Recommended Articles
Create and Run a Simple HTTP Server with Netty in Java
Learn how to set up and run a simple HTTP server using Netty in Java. #Netty #Java #HTTPServer
Understanding the Difference Between Netty Framework and Tomcat Web Server
Learn how Netty simplifies custom network protocols vs. using Tomcat for standard web server functionalities.
Mastering Netty Framework: Simplified Java NIO for Efficient Network Applications
Discover how Netty simplifies Java NIO and enhances network application performance. Learn about its key features like ease of use, minimal dependencies, and security support.
Learn How to Set Up a Simple HTTP Reverse Proxy with Netty - A Comprehensive Guide
Master the art of setting up a simple HTTP reverse proxy using Netty. Dive into core concepts and practical implementation steps.