HTTP Client for Keycloak using OpenID Connect
In modern web applications, authentication and authorization are critical components. Keycloak is a powerful open-source identity and access management solution for modern applications and services. This article will guide you through creating a Java HTTP client to test OpenID Connect token authentication with Keycloak, and we will also demonstrate the equivalent steps using curl.
Prerequisites
- A running Keycloak instance.
- A Keycloak realm and client configuration.
- Java Development Kit (JDK) 11 or later.
- Basic knowledge of Java programming.
If you are new to Keycloak, we recommend checking this article: Getting started with Keycloak powered by Quarkus
Setting Up Keycloak
Before diving into the Java code, ensure you have a Keycloak server running and a realm configured with a client and user. Here are the steps:
1 – Install Keycloak: Download and run the Keycloak server from the official Keycloak website.
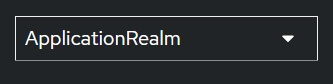
2 – Create a Realm: Log in to the Keycloak admin console, create a new realm. In our example we will be using the realm ApplicationRealm.
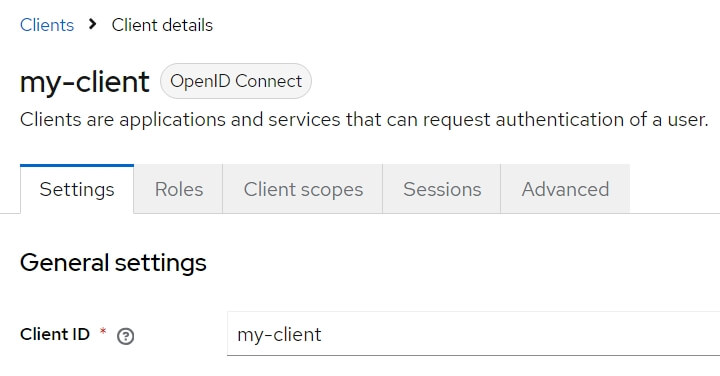
3 – Create a Client: Within the ApplicationRealm, create a new client. Our example uses the Client my-client.
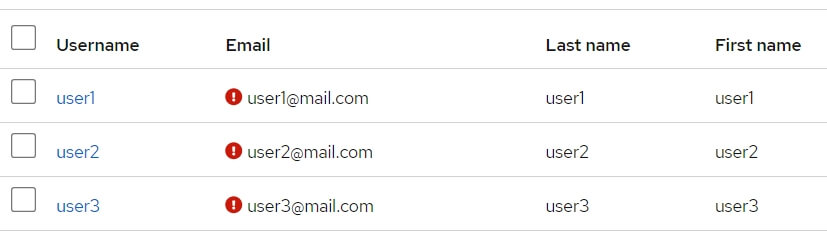
4 – Create Users: Add some users to your Realm. For example, we will use the user1 with a password (123456).
Java HTTP Client for Keycloak
Step 1: Add Dependencies
Ensure you have the following dependencies in your pom.xml for a Maven project:
<dependencies>
    <dependency>
        <groupId>com.fasterxml.jackson.core</groupId>
        <artifactId>jackson-databind</artifactId>
        <version>2.13.3</version>
    </dependency>
</dependencies>
Step 2: Write the Java Client
Here’s a Java application that sends a POST request to obtain a JWT token from Keycloak and then uses that token to access a protected endpoint.
import com.fasterxml.jackson.databind.JsonNode;
import com.fasterxml.jackson.databind.ObjectMapper;

import java.net.URI;
import java.net.URLEncoder;
import java.net.http.HttpClient;
import java.net.http.HttpRequest;
import java.net.http.HttpResponse;
import java.nio.charset.StandardCharsets;
import java.util.HashMap;
import java.util.Map;
import java.util.stream.Collectors;

public class SimplePostRequest {

    public static void main(String[] args) {
        String tokenUrl = "http://localhost:8080/realms/ApplicationRealm/protocol/openid-connect/token";
        String apiUrl = "http://localhost:8081/api/admin";

        String grantType = "password";
        String clientId = "my-client";
        String username = "user1";
        String password = "123456";

        try {
            // Prepare form data
            Map<Object, Object> data = new HashMap<>();
            data.put("grant_type", grantType);
            data.put("client_id", clientId);
            data.put("username", username);
            data.put("password", password);

            String form = data.entrySet()
                    .stream()
                    .map(entry -> entry.getKey() + "=" + URLEncoder.encode(entry.getValue().toString(), StandardCharsets.UTF_8))
                    .collect(Collectors.joining("&"));

            // Create HttpClient
            HttpClient client = HttpClient.newHttpClient();

            // Create HttpRequest for POST to get the token
            HttpRequest tokenRequest = HttpRequest.newBuilder()
                    .uri(URI.create(tokenUrl))
                    .header("Content-Type", "application/x-www-form-urlencoded")
                    .POST(HttpRequest.BodyPublishers.ofString(form))
                    .build();

            // Send the POST request
            HttpResponse<String> tokenResponse = client.send(tokenRequest, HttpResponse.BodyHandlers.ofString());
            System.out.println("POST Response Code :: " + tokenResponse.statusCode());

            if (tokenResponse.statusCode() == 200) { // success
                String responseBody = tokenResponse.body();
                System.out.println("Response Body: " + responseBody);

                // Parse JSON response
                ObjectMapper mapper = new ObjectMapper();
                JsonNode rootNode = mapper.readTree(responseBody);
                JsonNode accessTokenNode = rootNode.path("access_token");
                String token = accessTokenNode.asText();

                if (!accessTokenNode.isMissingNode()) {
                    System.out.println("Access Token: " + token);

                    // Create HttpRequest for GET to access the secured endpoint
                    HttpRequest apiRequest = HttpRequest.newBuilder()
                            .uri(URI.create(apiUrl))
                            .header("Authorization", "Bearer " + token)
                            .GET()
                            .build();

                    // Send the GET request
                    HttpResponse<String> apiResponse = client.send(apiRequest, HttpResponse.BodyHandlers.ofString());
                    System.out.println("GET Response Code :: " + apiResponse.statusCode());

                    if (apiResponse.statusCode() == 200) { // success
                        System.out.println("GET Response: " + apiResponse.body());
                    } else {
                        System.out.println("GET request not worked");
                        System.out.println("Error Response: " + apiResponse.body());
                    }
                } else {
                    System.out.println("Response: " + responseBody);
                }
            } else {
                System.out.println("POST request not worked");
                System.out.println("Error Response: " + tokenResponse.body());
            }
        } catch (Exception e) {
            e.printStackTrace();
        }
    }
}
Explanation
- Sending POST Request for Token:
- Prepare the form data for the POST request.
- Send the POST request to Keycloak to obtain the OpenID Connect token.
- Parse the JSON response to extract the token.
- Using the Token for Authenticated Request:
- Create a GET request to the protected endpoint, setting the
Authorizationheader with theBearertoken. - Send the GET request and print the response.
- Create a GET request to the protected endpoint, setting the
Testing with curl
You can achieve the same results using curl. Here are the steps:
Step 1: Obtain the Token
curl -X POST "http://localhost:8080/realms/ApplicationRealm/protocol/openid-connect/token" \
     -H "Content-Type: application/x-www-form-urlencoded" \
     -d "grant_type=password" \
     -d "client_id=my-client" \
     -d "username=user1" \
     -d "password=123456"
The response will include the access_token.
Step 2: Access the API Endpoint
curl -H "Authorization: Bearer <access_token>" "http://localhost:8081/api/admin"Replace <access_token> with the token obtained from the previous step.
Conclusion
In this article, we demonstrated how to create a Java HTTP client to interact with Keycloak for OpenID Connect token authentication and access a protected endpoint. We also showed the equivalent steps using curl. This guide should help you understand the process of testing OpenID Connect token authentication with Keycloak in your Java applications.
Recommended Articles
Keycloak Tutorial: Configuring Realm and Using WildFly as OpenID Client - Version 20
Learn how to configure a Keycloak Realm and use WildFly as an OpenID client. Includes terms like OAuth, OpenID Connect.
OpenID Connect Client Authorization Explained: Key Concepts and Importance
Discover how OpenID Connect client authorization works and why it matters for secure resource access.
Install Keycloak Client Adapters on WildFly for Enhanced Authentication/Authorization
Learn how to install Keycloak Client Adapters on WildFly 21 for seamless authentication/authorization management. #Keycloak #WildFly #Java
Connect Your Node.js App to Keycloak Using the Adapter - A Comprehensive Guide
Learn how to securely connect your Node.js app to Keycloak for authentication and authorization. Includes setup steps and example code.