Keycloak with Docker and Docker Compose (2026 Edition)
In this updated tutorial, we'll walk you through the step-by-step process of running Keycloak 26.7 with Docker. We will learn how to deploy Keycloak with Docker and Docker Compose, covering development mode, data persistence, realm import, reverse proxy configuration, and a production set up with PostgreSQL.
Prerequisites
- Docker (v24+) or Podman: install from docker.com or podman.io
- Docker Compose (v2+): the modern
docker composeCLI plugin, bundled with recent Docker Desktop/Engine installs; the legacy standalonedocker-composev1 binary reached end-of-life and should no longer be used - (Production) External database (PostgreSQL recommended)
- (Production) A reverse proxy or ingress (NGINX, HAProxy, Traefik, or a Kubernetes/OpenShift Ingress/Route) in front of Keycloak
Finally, if you are new to Keycloak, we recommend checking this article which introduces Keycloak with Quarkus: Keycloak Tutorial for Beginners
Step # 1: Pull the Image
The Keycloak Docker Image is available in this repository: quay.io/keycloak/keycloak. To pull the latest Docker Image of Keycloak you can run from the Command Line:
$ docker pull quay.io/keycloak/keycloak:latestThe latest version of Keycloak with Quarkus (July 2026) is 26.7.0. Unlike traditional application servers, Keycloak has no separate LTS branch: only the most recent minor release receives active development and security fixes, so pinning to a specific tag (for example quay.io/keycloak/keycloak:26.7.0) rather than latest is strongly recommended for anything beyond local experimentation, so upgrades happen intentionally rather than on the next container restart.
Step # 2: Run Keycloak Image in Development Mode
Then, the following command will start a Docker Image of Keycloak in development mode:
docker run --name keycloak_dev -p 8080:8080 \
    -e KC_BOOTSTRAP_ADMIN_USERNAME=admin \
    -e KC_BOOTSTRAP_ADMIN_PASSWORD=admin \
    quay.io/keycloak/keycloak:latest \
    start-dev
Please notice that, since Keycloak 26, the variables KC_BOOTSTRAP_ADMIN_USERNAME and KC_BOOTSTRAP_ADMIN_PASSWORD replace the older, now removed, KEYCLOAK_ADMIN and KEYCLOAK_ADMIN_PASSWORD variables. These bootstrap variables only create the initial admin account on first startup; once the admin user exists in the database, changing them has no further effect.
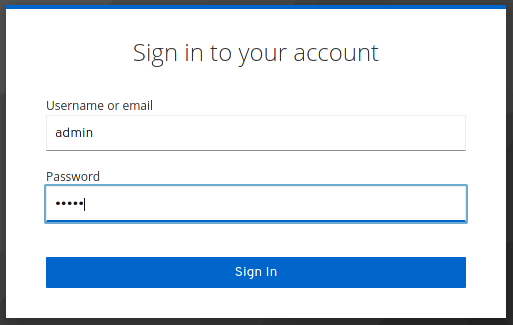
Next, verify the connectivity with the Admin Console which is available at http://localhost:8080
How to Start Keycloak Docker Image on a Different Port?
On the other hand, if you want to start Keycloak with Docker on a different server port, include the --http-port parameter:
docker run --name keycloak_dev -p 8180:8180 \
    -e KC_BOOTSTRAP_ADMIN_USERNAME=admin \
    -e KC_BOOTSTRAP_ADMIN_PASSWORD=admin \
    quay.io/keycloak/keycloak:latest \
    start-dev --http-port=8180
Step # 3: Run Keycloak with Docker in Production Mode
Finally, to start Keycloak in production mode with PostgreSQL as database, use the following example command:
docker run --name keycloak_auto_build -p 8443:8443 \
    -e KC_BOOTSTRAP_ADMIN_USERNAME=admin \
    -e KC_BOOTSTRAP_ADMIN_PASSWORD=admin \
    quay.io/keycloak/keycloak:latest \
    start \
    --db=postgres \
    --db-url=jdbc:postgresql://localhost:5432/keycloak \
    --db-username=postgres \
    --db-password=postgres \
    --hostname=auth.example.com \
    --https-key-store-file=/opt/keycloak/conf/server.keystore \
    --https-key-store-password=secret
Update the Database, hostname, and keystore settings accordingly. A few things changed since older Keycloak releases: the separate --auto-build step has been removed (the build now happens transparently as part of start when the configuration changes), and --features=token-exchange is no longer required to enable standard OAuth2 token exchange (RFC 8693), which graduated to a supported, always-on feature in recent Keycloak versions. Also notice that production mode requires an explicit --hostname and either a valid TLS certificate or a TLS-terminating reverse proxy in front of Keycloak — starting in start mode without HTTPS configured will fail by design.
Running Keycloak with Docker Compose
Docker Compose is a valuable tool to orchestrate multiple containers and to provide complex configurations to a Container Image. For example, you can use it to import an existing Realm when using the Keycloak Docker Image. To do that, you have to use the --import-realm option at startup. For example, with Docker Compose the following file will import the Realm available in the local file /home/keycloak/realm.json:
services:
  auth:
    image: quay.io/keycloak/keycloak:26.7.0
    ports:
      - "8080:8080"
    environment:
      KC_BOOTSTRAP_ADMIN_USERNAME: admin
      KC_BOOTSTRAP_ADMIN_PASSWORD: admin
    command:
      - start-dev
      - --import-realm
    volumes:
      - /home/keycloak/realm.json:/opt/keycloak/data/import/realm.json
To start Keycloak, simply run:
docker compose upNote the syntax: modern Docker ships Compose as a CLI plugin invoked as docker compose (two words), not the legacy standalone docker-compose binary. Both remain interchangeable for most simple files, but only the plugin form is actively maintained.
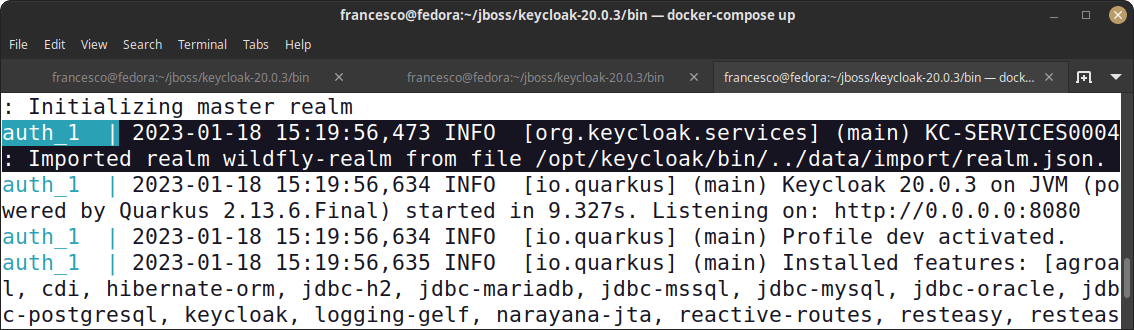
Finally, verify that the Realm in realm.json has been imported at start up:
Finally, notice how to use docker compose exec to run commands on the Keycloak Docker Image. For example, here is how to login and add a new User:
# Login into keycloak with admin credentials
docker compose exec auth /opt/keycloak/bin/kcadm.sh config credentials \
    --server http://localhost:8080 --realm master --user admin --password admin

# Add the user test
docker compose exec auth /opt/keycloak/bin/kcadm.sh create users --realm=master \
    -s username=test -s enabled=true -s email=test@example.com -s emailVerified=true \
    --server http://localhost:8080

# Set the password for the user test
docker compose exec auth /opt/keycloak/bin/kcadm.sh set-password --realm=master \
    --username test --new-password password --server http://localhost:8080
Running Keycloak with Docker Compose and PostgreSQL
The plain start-dev example above uses the built-in, embedded dev-mode database. In Production, you would need to switch to a solid Database, for example to PostgreSQL. The following sample docker-compose.yml file shows how to kickstart Keycloak with Docker Compose and PostgreSQL by bridging them in the same network, with a proper health check gating startup order:
volumes:
  postgres_data:
    driver: local

services:
  postgres:
    image: postgres:17
    volumes:
      - postgres_data:/var/lib/postgresql/data
    environment:
      POSTGRES_DB: keycloak
      POSTGRES_USER: keycloak
      POSTGRES_PASSWORD: 123456
    healthcheck:
      test: ["CMD-SHELL", "pg_isready -U keycloak"]
      interval: 10s
      timeout: 5s
      retries: 5
    ports:
      - "5432:5432"
    networks:
      - keycloak_demo

  keycloak:
    image: quay.io/keycloak/keycloak:26.7.0
    command: start-dev
    environment:
      KC_DB: postgres
      KC_DB_URL_HOST: postgres
      KC_DB_URL_DATABASE: keycloak
      KC_DB_PASSWORD: 123456
      KC_DB_USERNAME: keycloak
      KC_DB_SCHEMA: public
      KC_BOOTSTRAP_ADMIN_USERNAME: admin
      KC_BOOTSTRAP_ADMIN_PASSWORD: password
    ports:
      - "8081:8080"
    depends_on:
      postgres:
        condition: service_healthy
    networks:
      - keycloak_demo

networks:
  keycloak_demo:
    driver: bridge
Note that the top-level version: key used in older Compose files (such as version: '3') is now obsolete and ignored by current Compose implementations; it can simply be omitted, as shown above.
Placing Keycloak Behind a Reverse Proxy
In production you'll almost always run Keycloak behind a reverse proxy or load balancer that terminates TLS and forwards traffic on the internal Docker network. Recent Keycloak releases have expanded the official reverse proxy guides with ready-made blueprints for both HAProxy and Traefik, in addition to the existing NGINX guidance. Whichever proxy you choose, keep these points in mind:
- Set
--proxy-headers=xforwarded(orforwarded, depending on your proxy) so Keycloak trusts theX-Forwarded-*headers for hostname, protocol, and port. - Always set an explicit
--hostnamematching the public-facing URL, so issued tokens and redirect URIs are consistent regardless of which internal container served the request. - Terminate TLS at the proxy layer when Keycloak sits on a private Docker network, and use
--http-enabled=trueonly for the internal, non-public listener.
Production Readiness and Kubernetes/OpenShift Deployment
Docker and Docker Compose are excellent for local development, CI pipelines, and small single-node deployments, but most production environments eventually move Keycloak onto an orchestrator. A few things to plan for as you scale beyond Docker Compose:
- Use the Keycloak Operator on Kubernetes/OpenShift instead of hand-rolled manifests: it manages rolling upgrades, TLS certificates, and the
Keycloak/KeycloakRealmImportcustom resources for you. - Externalize the database to a managed PostgreSQL instance with automated backups and connection pooling (e.g. PgBouncer), rather than a database container tied to the same node.
- Run multiple replicas behind a Service/Ingress or Route, and review Keycloak's clustering/caching documentation (Infinispan) for how session replication behaves across pods.
- Externalize secrets (admin credentials, DB passwords, keystore passwords) using Kubernetes Secrets or a vault solution rather than plain environment variables in your Compose file, which is fine for local dev but not for production.
- Monitor health and metrics via Keycloak's built-in health and metrics endpoints (
/health,/metrics) wired into liveness/readiness probes and your observability stack (Prometheus/Grafana).
Conclusion
You now have a lean, step-by-step setup for running Keycloak in Docker — covering quick dev instances, data persistence, Compose orchestration, reverse proxy configuration, and a production configuration with PostgreSQL. From here, explore realm customization, secure your instance with proper TLS and a reverse proxy, and, when you outgrow a single Docker host, look at the Keycloak Operator for Kubernetes or OpenShift to run it at scale.
Frequently Asked Questions
What is the latest Keycloak Docker image version?
As of July 2026, the latest release is Keycloak 26.7.0. Keycloak has no separate LTS branch — only the newest minor version receives active security fixes — so it's best to pin a specific version tag in production rather than tracking latest.
What replaced KEYCLOAK_ADMIN and KEYCLOAK_ADMIN_PASSWORD?
Since Keycloak 26, use KC_BOOTSTRAP_ADMIN_USERNAME and KC_BOOTSTRAP_ADMIN_PASSWORD. These only take effect on the very first startup, when no admin user exists yet in the configured database.
Why does Keycloak refuse to start in production mode without HTTPS?
Keycloak's start command (as opposed to start-dev) enforces HTTPS by default as a security guardrail. You need either a valid TLS keystore configured directly on Keycloak, or a reverse proxy that terminates TLS and forwards traffic to Keycloak over the internal network with --proxy-headers configured accordingly.
Should I use docker-compose or docker compose?
Prefer the modern docker compose CLI plugin (two words), which ships with current Docker Engine/Desktop installations and is actively maintained. The legacy standalone docker-compose v1 binary is end-of-life and should be migrated away from.
How do I import an existing realm automatically when the container starts?
Mount your realm export JSON file into /opt/keycloak/data/import/ and add the --import-realm flag to the startup command, as shown in the Docker Compose example above. Keycloak will import it during startup if the realm doesn't already exist.
Can I run Keycloak with an embedded database for production?
No. The embedded dev-mode database used by start-dev is not suitable for production: it's meant for local testing only and doesn't provide the durability, backup, or concurrent-access characteristics production traffic needs. Always configure an external database such as PostgreSQL for anything beyond local development.
What's the difference between running Keycloak with Docker Compose and on Kubernetes?
Docker Compose is well suited to local development, testing, and small single-host deployments. For production at scale, most teams move to Kubernetes or OpenShift using the official Keycloak Operator, which automates upgrades, TLS certificate handling, and realm imports via custom resources, and integrates more naturally with autoscaling, multiple replicas, and centralized secrets management.
Do I still need the token-exchange feature flag?
No. Standard OAuth2 token exchange (RFC 8693) has graduated from an opt-in preview feature to a supported, always-on capability in recent Keycloak releases, so the older --features=token-exchange flag is no longer required for it.
Recommended Articles
Keycloak Tutorial: Setting Up and Configuring WildFly with the Latest Stable Build
Learn how to set up and configure Keycloak for an Enterprise application running on WildFly. Includes steps for downloading, starting, and configuring a Keycloak Realm.
Keycloak Federating Users from PostgreSQL Database Using User Storage SPI - A Comprehensive Guide
Learn how to federate users from a PostgreSQL database using Keycloak's User Storage SPI. #Keycloak #PostgreSQL #UserStorageSPI #Federation #Middleware
Mastering Keycloak REST API: Creating, Updating & Deleting Entities
Learn how to interact with Keycloak's REST API for managing users, groups, clients, roles and realms using any HTTP-supported language. Get started with Docker and the admin-cli Client.
Enhance User Authentication with Social Login in Keycloak - A Step-by-Step Tutorial
Learn how to configure social login using Google Identity Provider in Keycloak for seamless user authentication. #Keycloak #GoogleIdentityProvider #Java #Middleware #CloudNative