How to export and import Realms in Keycloak
This article discusses about Importing and Exporting Keycloak Realms using the latest product distribution which runs on a Quarkus runtime. We will also learn how to export Keycloak Users by running just a simple command line script, plus how to automate realm export/import through the Admin REST API and the Keycloak Operator, for teams who manage realms as part of a CI/CD or GitOps workflow.
Keycloak Realm Set up
If you’re moving from one Keycloak instance to another, or if you want to share your realm with someone else, you may need to export and import your realm. In this article, we’ll explain how to export and import a Keycloak realm, step by step.
Firstly, if you are new to Keycloak and Quarkus, we recommend checking this article which covers the basics: Getting started with Keycloak powered by Quarkus
A Keycloak Realm is a space where you manage objects, including users, applications, roles, and groups. A user belongs to and logs into a realm. In order to test Realm export/import we will at first create the wildfly-realm.
Use the following batch script in order to create it:
./kcadm.sh config credentials --server http://localhost:8180 --realm master --user admin --password admin

./kcadm.sh create realms -s realm=wildfly-realm -s enabled=true -o

./kcadm.sh create users -r wildfly-realm -s username=customer-admin -s enabled=true

./kcadm.sh set-password -r wildfly-realm --username customer-admin --new-password admin

./kcadm.sh create clients -r wildfly-realm -s clientId=customer-manager-client -s publicClient="true"  -s "redirectUris=[\"http://localhost:8080/*\"]" -s enabled=true

./kcadm.sh create roles -r wildfly-realm -s name=customer-manager

./kcadm.sh add-roles --uusername customer-admin --rolename customer-manager -r wildfly-realm
In the next paragraphs, we will show how to export and import the wildfly-realm.
Exporting a Keycloak Realm
There are three possible strategies to export/import Keycloak Realms, and picking the right one matters more than it might seem:
- Partial import/export: done through the Admin Console, or via the Admin REST API. This kind of export does not include Users, and — unlike the CLI option below — does not require stopping the server.
- Full export/import: using the Keycloak command line ( kc.sh ) available in the bin folder of your installation. This is the most complete option (it can include Users), but it requires the server to be stopped.
- Automated / GitOps import: using the Keycloak Operator on Kubernetes, or a startup-time import, so the realm definition lives as a versioned file rather than a manual export.
Let’s see at first how to use the Admin Console.
Partial Realm Export using the Admin Console
Log in the Keycloak Admin Console. Select your Realm and choose the Realm Settings option from the left menu:
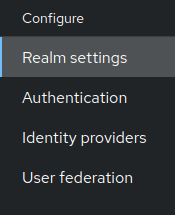
Then, choose from the top right menu Action | Partial export. In the following UI you will be able to choose if your Realm export also includes the Groups and Roles and the Clients available in the Realm:
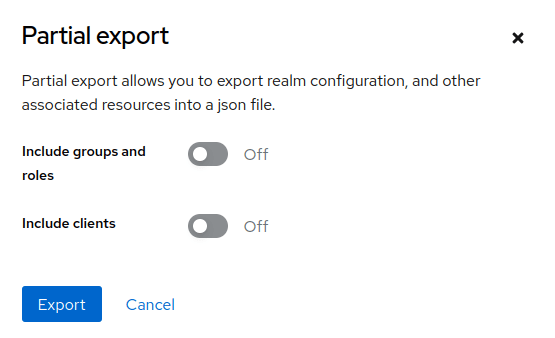
Click on Export to download the Realm as a JSON file.
Note: the layout of the Admin Console has evolved across recent Keycloak versions (the console was rebuilt on a new React-based UI), so menu positions may look slightly different from the screenshots above depending on the version you run. The underlying actions — Realm Settings → Action → Partial export — are unchanged.
Full Realm export using the Command Line
To fully export a Realm from the Command Line, you can use the export option in the Keycloak kc.sh tool. For example, the following command exports the Realm “demo-realm” into a file realm.json:
./kc.sh export --file realm.json --realm demo-realmLet’s see another example. Here we are exporting the wildfly-realm into the directory data/import from the root of your installation:
./kc.sh export --realm wildfly-realm --dir ../data/importA file <RealmName>-realm.json is now available under the Keycloak_HOME/data/import:
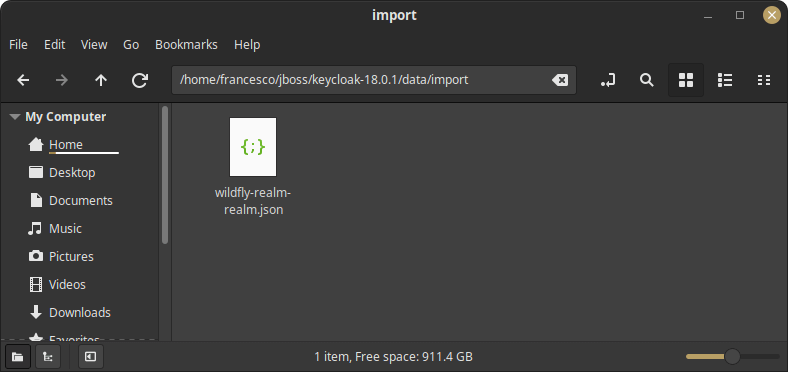
To import the Realm, there are several options available. Let’s see them in detail.
⚠️ The server must be stopped for a CLI export/import
This is the detail that trips up most people the first time: the kc.sh export and kc.sh import commands must be run while your Keycloak instance is not running. This is by design — export/import are treated as one-off server bootstrap operations, not regular admin actions. If you run them against a live production cluster, you risk cache inconsistency between nodes, since the command doesn’t participate in the cluster’s caching layer. If you need to change a realm on a running server without downtime, use the Admin Console partial export/import, or the REST API described further down, instead of the CLI.
Exporting Keycloak Users
When you run the command “kc.sh export --file realm.json --realm demo-realm” it actually exports both the Realm Settings and the Users available for that Realm. It is however possible to have distinct exports both for the Realm and the Users.
To do that, you can pass the option different_files to the --users option. For example:
./kc.sh export --dir realm --realm demo --users different_filesAs a result, the folder realm will contain distinct JSON files:
8/29/2024  05:06 PM            75,427  demo-realm.json
08/29/2024  05:06 PM             1,471 demo-users-0.json
By default Keycloak writes up to 50 users per file. If you have a large user base, tune this with --users-per-file:
./kc.sh export --dir realm --realm demo --users different_files --users-per-file 100Importing a Realm in Keycloak
The simplest option to import a Keycloak Realm is to use the Admin Console. Choose “Create Realm”. Then, point to the location where your Realm is stored. Alternatively, paste the Realm definition file in the Resource file text area:
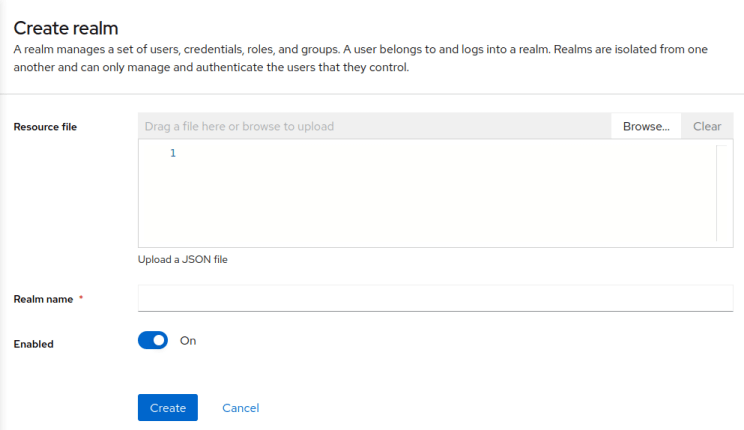
To import a Realm using the Command line, you can also use the import option of the kc shell command. You can either pass as argument a directory:
./kc.sh import --dir ../data/importThe above example will import all Realms available in that dir. You can also import a realm from a single file. For example:
./kc.sh import --file ../data/import/wildfly-realm-realm.jsonBy default, if a realm with the same name already exists, the import command overrides it. If you’d rather skip realms that already exist — handy when re-running an import script against an environment that may already be provisioned — set --override false:
./kc.sh import --dir ../data/import --override falseAlso worth knowing: if you’ve built an optimized server image (via kc.sh build), add the --optimized flag to export/import commands to skip the re-build check and start faster — useful when these commands run as a step in a CI pipeline rather than interactively.
Importing a Realm at Start up
Finally, you can also import the Realm at start up time by adding the –import-realm option to your start command. For example, to import Realms from the default directory:
./kc.sh start-dev --http-port=8180 --import-realmYou should be able to see in the server start up logs the following message:
2022-06-24 11:28:48,986 INFO [org.keycloak.services] (main) KC-SERVICES0004: Imported realm wildfly-realm from file /home/jboss/keycloak-18.0.1/bin/../data/import/wildfly-realm-realm.json.On the other hand, if you want to specify a file, for example in the current directory, you can use the following command:
./kc.sh import --file realm.jsonAutomating Realm Export/Import with the Admin REST API
If you’re scripting realm backups or promoting a realm between environments as part of a pipeline, stopping the server for every export or import is rarely acceptable. Keycloak’s Admin REST API exposes the same partial export/import logic used by the Admin Console, and it works against a running server:
POST /admin/realms/{realm}/partial-export?exportClients=true&exportGroupsAndRoles=trueThis call requires a bearer token with sufficient realm-management privileges (typically obtained via kcadm.sh get-token or a service account client), and returns the same kind of JSON representation you’d get by clicking Export in the console — only without leaving the terminal. On the import side, the equivalent endpoint accepts a previously exported (or hand-crafted) JSON payload and applies it to an existing realm:
POST /admin/realms/{realm}/partialImportwith a body such as:
{
  "ifResourceExists": "OVERWRITE",
  "clients": [ ... ],
  "roles": { ... },
  "users": [ ... ]
}
The ifResourceExists field controls what happens when a resource in the payload already exists in the target realm: you can choose to SKIP it, OVERWRITE it, or FAIL the whole import. Unlike the CLI import, a REST-based partial import only adds or overwrites the resources you send — it won’t remove anything that already exists in the realm but is absent from the payload, so it’s a safer fit for incremental updates than for a full realm reset.
GitOps-Style Realm Management with the Keycloak Operator
If you run Keycloak on Kubernetes or OpenShift, the Keycloak Operator gives you a native, declarative alternative to manually running import commands: a KeycloakRealmImport Custom Resource that ties a realm definition directly to your GitOps repository.
apiVersion: k8s.keycloak.org/v2beta1
kind: KeycloakRealmImport
metadata:
  name: wildfly-realm-import
spec:
  keycloakCRName: my-keycloak
  realm:
    realm: wildfly-realm
    enabled: true
    # ... the full RealmRepresentation, typically produced by
    # a previous export and converted to YAML
The recommended way to obtain the content of the realm field is exactly what this article already covers: export the realm with kc.sh export (or the REST API above), convert the resulting JSON to YAML, and commit it alongside the rest of your cluster configuration. This Custom Resource must live in the same namespace as your Keycloak CR. It’s a good fit for teams who want realm changes to go through the same pull-request review and rollout process as any other Kubernetes manifest, instead of being applied by hand against a running instance.
For non-Kubernetes CI/CD pipelines, community tools such as keycloak-config-cli follow a similar philosophy — diffing a YAML/JSON realm definition against the live realm and applying only the difference — and are worth evaluating if you need idempotent, repeatable realm provisioning outside of a cluster.
Conclusion
This article was a complete walk through the import and export of Keycloak realms: the classic Admin Console and kc.sh CLI workflow, the operational gotcha of the server needing to be stopped for CLI operations, and the more automation-friendly paths — the Admin REST API and the Keycloak Operator — for teams who need to export or promote realms without downtime or manual steps. To learn how to import a Realm in a Docker container we recommend checking this article: How to run Keycloak with Docker
Recommended Articles
How to Use Keycloak REST API (2026 Edition)
How to use the Keycloak REST Admin API in 2026: get an access token, create Realms, Users and manage them via curl, plus production-safe alternatives to the password grant and Kubernetes/OpenShift automation tips.
Automatically Create an Admin User in Keycloak Using Environment Variables and Web Console
How to add an admin user in Keycloak 26.7: the Web Console, KC_BOOTSTRAP_ADMIN_USERNAME/PASSWORD, the kc.sh bootstrap-admin command for setup and password recovery, and Kubernetes Secret best practices.
Securing a MicroProfile Application with Keycloak 26.0.0
Learn how to secure your MicroProfile application running with Thorntail runtime and Keycloak, including setting up realms, roles, users, and client policies.
Introduction to Keycloak (2026)
Introduction to Keycloak (2026): install and configure Keycloak, create your first Realm, Role, User and Client, and secure a WildFly application with OIDC — updated for Keycloak 26.7 and current WildFly releases.