How to install KeyCloak with Ansible
This tutorial guides you through provisioning a Keycloak server using Ansible. Keycloak is an open-source identity and access management (IAM) solution perfect for securing your applications. Ansible is a powerful automation tool that simplifies server configuration and deployment.
Prerequisites:
- Ansible installed and configured on your control machine.
- An SSH connection established to the target server where you want to deploy Keycloak.
- Basic understanding of Ansible playbooks and roles. If you are new to Ansible playbooks, check this article: Ansible Playbook Example for beginners
Step 1: Install Keycloak Role
Ansible playbook and roles are available here: https://github.com/ansible-middleware/keycloak/tree/main
Download or clone the Repository on your machine. Then, we will install Keycloak Role.
Ansible Galaxy provides a pre-built role specifically designed for Keycloak provisioning. Use the following command to install it:
ansible-galaxy collection install middleware_automation.keycloakStep 2: Create the Inventory File
An inventory file defines the target servers Ansible will manage. Create a file named hosts in your Ansible project directory and add the hostname or IP address of the server where you want to deploy Keycloak: For the sake of simplicity, we will install Keycloak on the same machine when you run Ansible.
Therefore, create the following hosts.ini Inventory file:
[keycloak]
localhost ansible_connection=local
Step 3: Provision Keycloak
The playbooks folder of the Repository contains several Ansible playbooks you can use to provision a Keycloak installation. For example the playbooks/keycloak_quarkus_dev.yml will provision a Keycloak with Quarkus distribution that starts in dev mode:
---
- name: Playbook for Keycloak X Hosts in develop mode
  hosts: all
  vars:
    keycloak_admin_password: "remembertochangeme"
    keycloak_quarkus_host: localhost
    keycloak_quarkus_port: 8080
    keycloak_quarkus_log: file
    keycloak_quarkus_start_dev: true
    keycloak_quarkus_proxy_mode: none
  roles:
    - middleware_automation.keycloak.keycloak_quarkus
To learn more about running Keycloak Quarkus distribution check this article: Getting started with Keycloak powered by Quarkus
Then, provision Keycloak with the following command:
ansible-playbook -i hosts.ini playbooks/keycloak_quarkus_dev.yml -e keycloak_quarkus_admin_pass=francesco12345 --ask-become-passIf you run an Ansible task that requires a privilege escalation, i.e. with become: true, you may get an error “sudo: a password is required”. Therefore we have added the --ask-become-pass which will prompt for the sudo password.
At the end of the Playbook installation, you should be able to find Keycloak in the following path:
sudo ls -ltr /opt/keycloak/keycloak-23.0.7
total 20
-rw-r--r--. 1 keycloak keycloak    26 Feb 22 08:39 version.txt
-rw-r--r--. 1 keycloak keycloak   492 Feb 22 08:39 README.md
-rw-r--r--. 1 keycloak keycloak 11358 Feb 22 08:39 LICENSE.txt
drwxr-xr-x. 1 keycloak keycloak    56 Feb 22 08:58 lib
drwxr-xr-x. 1 keycloak keycloak    18 Feb 22 08:58 themes
drwxr-xr-x. 1 keycloak keycloak    18 Feb 22 08:58 providers
drwxr-xr-x. 1 keycloak keycloak   150 Feb 22 08:58 bin
drwxr-xr-x. 1 keycloak keycloak   108 Mar 26 12:38 conf
drwxrwxr-x. 1 keycloak keycloak    10 Mar 26 12:38 data
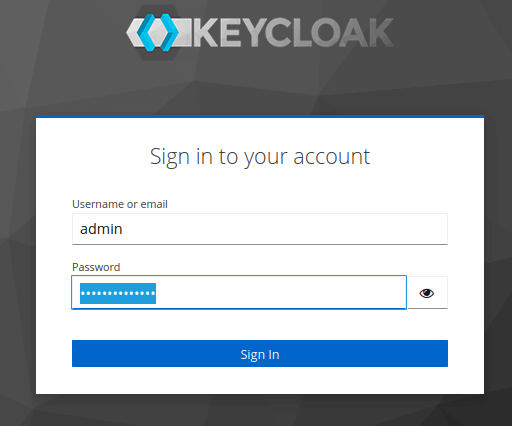
Also, Keycloak is now running on localhost:8080:
How to customize Keycloak Playbook
The playbook in the repository uses defaults for most variables of the Role. You can fine-tune your Keycloak installation by setting the following Role attributes:
| Variable | Description | Default |
|---|---|---|
keycloak_admin_user |
Administration console user account | admin |
keycloak_host |
hostname | localhost |
keycloak_context |
Context path for rest calls | /auth |
keycloak_http_port |
HTTP port | 8080 |
keycloak_https_port |
TLS HTTP port | 8443 |
keycloak_auth_realm |
Name of the main authentication realm | master |
keycloak_management_http_port |
Management port | 9990 |
keycloak_auth_client |
Authentication client for configuration REST calls | admin-cli |
keycloak_client_public |
Configure a public realm client | True |
keycloak_client_web_origins |
Web origins for realm client | + |
keycloak_url |
URL for configuration rest calls | http://{{ keycloak_host }}:{{ keycloak_http_port }} |
keycloak_management_url |
URL for management console rest calls | http://{{ keycloak_host }}:{{ keycloak_management_http_port }} |
Conclusion
This article was a walkthough the provisioning of Keycloak with Ansible. By following these steps, you can leverage Ansible to automate Keycloak provisioning, reducing manual configuration tasks and streamlining your IAM infrastructure setup.
Recommended Articles
Securing a MicroProfile Application with Keycloak 26.0.0
Learn how to secure your MicroProfile application running with Thorntail runtime and Keycloak, including setting up realms, roles, users, and client policies.
Keycloak Tutorial: Setting Up and Configuring WildFly with the Latest Stable Build
Learn how to set up and configure Keycloak for an Enterprise application running on WildFly. Includes steps for downloading, starting, and configuring a Keycloak Realm.
Create a Quickstart Java EE Application Secured with Keycloak Using kcadm CLI
Learn how to secure your Java EE application with Keycloak using its command line interface (kcadm). #JavaEE #Keycloak #WildFly #Security
Enhance User Authentication with Social Login in Keycloak - A Step-by-Step Tutorial
Learn how to configure social login using Google Identity Provider in Keycloak for seamless user authentication. #Keycloak #GoogleIdentityProvider #Java #Middleware #CloudNative