How to Secure Keycloak with HTTPS
When it comes to securing Keycloak, an open-source identity and access management solution, using HTTPS is a crucial step in protecting user credentials and other sensitive data. In this article, updated for Keycloak 26.7, we'll explore the benefits of using HTTPS with Keycloak and provide a step-by-step guide on how to enable HTTPS in your Keycloak installation, using current TLS best practices.
Firstly, if you are new to Keycloak powered by Quarkus, we recommend having a look at the following article: Getting started with Keycloak powered by Quarkus
By using HTTPS, you can ensure that all communication between your Keycloak server and clients is encrypted and secure. This is especially important if you're using Keycloak to manage user authentication and authorization for your web application, as it prevents attackers from stealing user credentials and gaining unauthorized access to your application.
Enabling HTTPS in Keycloak is a straightforward process. Here's a step-by-step guide on how to do it:
Create or Obtain an SSL/TLS Certificate
Before you can enable HTTPS in Keycloak, you'll need to obtain an SSL/TLS certificate from a trusted certificate authority (CA). You can purchase a certificate from a commercial CA, request a free certificate from Let's Encrypt, or use a self-signed certificate.
For learning purposes we will create a self-signed certificate. You can either use a Java Keystore for this purpose or a PEM file.
Using a Java Keystore to Secure Keycloak
Since JDK 9, PKCS12 — not the older, proprietary JKS format — has been the JVM's default keystore type, and it's what current Keycloak documentation and tooling expect by default. The keystore is password-protected, meaning that you need to provide a password to access and manipulate the keys and certificates within it.
For example:
keytool -genkeypair -alias localhost -keyalg RSA -keysize 2048 -validity 365 \
    -keystore server.keystore -storetype PKCS12 \
    -dname "cn=Server Administrator,o=Acme,c=GB" -keypass secret -storepass secret
Next, rebuild your Keycloak configuration:
./kc.sh buildThen, if you copy the above server.keystore into the conf folder of your installation, Keycloak will assume that you want to use that file when you explicitly disable the default (HTTP) protocol with http-enabled set to false:
./kc.sh start --http-enabled=false --https-key-store-password=secret --hostname=fedoraOn the other hand, if you want to provide the keystore in a custom location, use the https-key-store-file property. For example:
./kc.sh start --https-key-store-file=/path/server.keystore --https-key-store-password=secret --hostname=fedoraWhich TLS protocols does Keycloak use by default?
Current Keycloak releases negotiate TLS 1.3 first when the client supports it, falling back to TLS 1.2 for compatibility — both are enabled by default, while TLS 1.0/1.1 are not supported at all. If you need to restrict or explicitly pin the protocol list (for compliance requirements, for example), use the https-protocols property:
./kc.sh start --https-protocols=TLSv1.3,TLSv1.2 --https-key-store-password=secret --hostname=fedoraSecuring Sensitive Information in a Vault
The previous Keycloak WildFly distribution provided a built-in vault provider to use secrets from a keystore-backed Elytron credential store. That mechanism no longer exists — it was fully replaced, not merely deprecated, by a Quarkus-native vault mechanism in the current Keycloak distribution. Keycloak now supports a file-based vault out of the box (build with --vault=file, then point --vault-dir at a directory containing one file per secret, named <realm>_<key>), as well as a keystore-backed vault for storing secrets like the ones used in this article's own configuration. See the official Keycloak Vault documentation for the current, complete reference — the migration discussed in older versions of this article is finished.
Securing Keycloak with a PEM File and Certificate
PEM is a widely-used text-based format that originated from the Privacy-Enhanced Mail standard. It is not specific to Java and can be used across different platforms and programming languages. A PEM file typically contains a single certificate or a private key. However, it can also include multiple certificates, such as a certificate chain.
If you want to create a self-signed key file and certificate for testing purposes, you can follow these steps:
Generate a private key: use OpenSSL to generate a private key in PEM format. Run the following command:
openssl genrsa -out keycloak.key 2048This command will generate a 2048-bit RSA private key and save it in the keycloak.key file.
Generate a self-signed certificate: use the private key to generate a self-signed certificate. Run the following command:
openssl req -new -x509 -sha256 -key keycloak.key -out keycloak.crt -days 365This command will prompt you to enter some information for the certificate. You can provide the required information or leave it blank for testing purposes. The self-signed certificate will be saved in the keycloak.crt file.
Create the PEM key file: to create the PEM key file, rename the private key file to have the .pem extension:
mv keycloak.key keycloak.pemCreate the PEM certificate file: to create the PEM certificate file, concatenate the self-signed certificate with the private key file. Run the following command:
cat keycloak.crt >> keycloak.pemNow you have the PEM key file (keycloak.pem) and the PEM certificate file (keycloak.crt) generated as a self-signed set for testing purposes.
You can start Keycloak using PEM files as follows:
./kc.sh start --https-certificate-file=/path/keycloak.crt --https-certificate-key-file=/path/keycloak.pem --hostname=fedoraTesting Secured Keycloak
You can verify that your Keycloak distribution uses HTTPS by checking the default server address and port. For example: https://localhost:8443
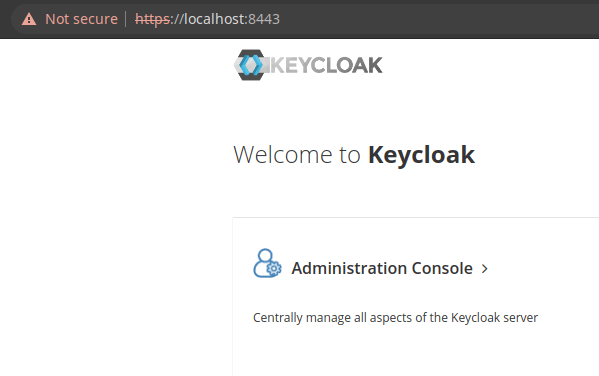
To confirm which TLS version was actually negotiated rather than just assuming it, use curl or openssl:
curl -v --tlsv1.3 https://localhost:8443
# or
openssl s_client -tls1_3 -connect localhost:8443
Two-Way Secure Communication
To enable the validation of client certificates and support authentication methods like two-way TLS, it is necessary to establish a truststore containing all the trusted certificates (including the certificate chain) that the server should recognize. Various capabilities, such as Mutual-TLS Client Authentication and End-User X.509 Browser Authentication, rely on this truststore for proper client certificate authentication. To configure the location of this truststore, execute the following command:
./kc.sh start --https-trust-store-file=/path/truststore --https-trust-store-password=passwordFinally, if you want to control the validation of client certificates accessing Keycloak, you can set the https-client-auth property as follows:
none: Keycloak will not request or validate client certificatesrequired: Keycloak will always request valid client certificatesrequest: Keycloak will also accept requests without a certificate and only validate a certificate if one is presented
Running Behind a Reverse Proxy or Kubernetes/OpenShift
The steps above cover securing Keycloak's own listener directly, which is exactly what you want for a bare-metal or VM install. In containerized deployments, a few things change:
- Mount the keystore/PEM files as a Kubernetes/OpenShift Secret rather than baking them into the container image, so certificate rotation doesn't require rebuilding and redeploying the image.
- Automate issuance and renewal with cert-manager on Kubernetes/OpenShift (or another ACME client), rather than manually regenerating self-signed certificates like the ones in this tutorial.
- Decide where TLS actually terminates. A common, valid pattern is terminating TLS at the Ingress/Route or a service mesh, with Keycloak itself listening on plain HTTP over the internal cluster network (
--http-enabled=true, no HTTPS flags needed on Keycloak). If you need end-to-end encryption all the way to the Keycloak pod instead, apply the keystore/PEM setup from this article inside the pod as usual, with the certificate mounted from a Secret. - Set
--hostnameexplicitly to the public-facing URL regardless of where TLS terminates, and configure--proxy-headersso Keycloak trusts theX-Forwarded-*headers from your Ingress/Route/load balancer — otherwise issued tokens and redirect URIs can end up pointing at the wrong internal address.
Conclusion
In conclusion, implementing HTTPS security measures for Keycloak is not just a recommendation, but a crucial step towards ensuring the utmost protection for user data and authentication processes. By securing Keycloak with SSL/HTTPS — preferring TLS 1.3 where possible, storing secrets in the current Quarkus-native vault, and adapting the approach for containerized deployments — organizations can establish encrypted connections, prevent data interception and tampering, and enhance overall system security.
Frequently Asked Questions
Should I use a PKCS12 keystore or plain PEM files to secure Keycloak?
Both work equally well and Keycloak supports either natively. PKCS12 is convenient if you're already managing Java keystores elsewhere in your infrastructure; PEM files are more portable across non-Java tooling (nginx, HAProxy, cert-manager output) and are usually the more natural choice in containerized/Kubernetes environments.
Does Keycloak support TLS 1.3?
Yes, and it's negotiated by default whenever the connecting client also supports it, with TLS 1.2 as the fallback. TLS 1.0 and 1.1 are not supported. Use the https-protocols property only if you need to explicitly restrict which of TLS 1.2/1.3 are allowed.
Is the old WildFly-based vault still available in Keycloak?
No. The Elytron credential-store-based vault from the legacy WildFly distribution is gone. Current Keycloak uses its own Quarkus-native vault mechanism (file-based or keystore-based) — see the official Vault documentation for the current setup.
Should I terminate TLS at Keycloak itself or at my Ingress/load balancer?
Either is valid. Terminating at the Ingress/Route/load balancer is simpler to operate and is the more common pattern on Kubernetes/OpenShift; terminating (or re-terminating) at Keycloak itself gives you end-to-end encryption into the pod, at the cost of managing certificates inside the cluster network too. Choose based on your compliance requirements and existing infrastructure.
What does the https-client-auth property control?
It controls whether Keycloak requests and validates client (mutual TLS) certificates: none disables it, required mandates a valid client certificate on every connection, and request accepts connections both with and without one, validating it only when present.
How do I confirm HTTPS is actually working after configuring it?
Beyond just loading https://localhost:8443 in a browser, use curl -v --tlsv1.3 https://your-host:8443 or openssl s_client -tls1_3 -connect your-host:8443 to confirm which protocol version was actually negotiated, rather than assuming it from the URL alone.
Recommended Articles
Keycloak Powered by Quarkus: Best Practices for Installation and Configuration
Learn how to install, start, and configure Keycloak powered by Quarkus. Explore best practices for secure microservice architecture.
Create a Quickstart Java EE Application Secured with Keycloak Using kcadm CLI
Learn how to secure your Java EE application with Keycloak using its command line interface (kcadm). #JavaEE #Keycloak #WildFly #Security
Effortlessly Import & Export Keycloak Realms Using Quarkus - A Step-by-Step Guide
Learn how to export and import Keycloak realms using Quarkus, including exporting users with a simple command line script. #Keycloak #Quarkus #Java #CloudNative
Provisioning a Keycloak Server with Ansible - Simplified Identity Management
Learn how to provision a secure Keycloak server using Ansible. Perfect for securing your applications. #Ansible #Keycloak #IdentityManagement #CloudNative